Sunday, 30 December 2012

Tadpole pond

As expected, my kids have been busy playing with the new scooters and toys that Santa brought them for Christmas. On Boxing Day, when they visited their grandparents they came home with a jar of tadpoles from the pond. We knew the poor tadpoles wouldn't be happy to stay in an old coffee jar for long so we set to work to make a temporary pond in our front garden.

We used an old laundry tub.


I dragged our spade out of the shed and dug a hole in the ground. Geez it is hard to make a dent in clay soil! However, I kept going as far as I could so we could hide the ugly plastic bucket a little.


Alex helped fill the tub with water.


Then he took great pleasure pouring the tadpoles into their new home.


Jasmine and Alex walked around our garden gathering flowers, sticks and leaves to decorate the outside of the pond.


So it still looks a little like a laundry tub but thankfully this doesn't seem to bother the kids!

Friday, 21 December 2012

Glue batik


Only four more days until Christmas. Pretty exciting! We made glue batik pillow slips just in time to put them at the end of the kids' beds for Santa to fill on Christmas Eve.

I have great memories making batik fabric at primary school. I have wanted to try this technique with my kids but have been turned off by the potential accidents from using hot wax. So when I came across the idea of batik using glue I knew I had to try it.

I took tips from the blog "That artist woman". She recommended using Elmer's gel glue. I didn't have any so tried using a different water based craft glue. Unfortunately the glue proved so sticky that it didn't come off even after I soaked it for a day. So, I made sure to try it again with Elmer's glue. I found some at a newsagency by chance but also discovered you can buy it on ebay and from Office Works.

Step 1 - Draw pattern on fabric with glue. Don't forget to put a cloth underneath so the glue doesn't seep through the other side. Leave to dry for a day.


Step 2 - Once glue has dried fully, paint over the fabric with watered down paint. We used fabric paint. However, I have read that regular acrylic paint works just as well.


Step 3 - when paint is dry, wash off with soap and warm water. I used a nail brush to make sure all the glue had rinsed off.

Tuesday, 11 December 2012

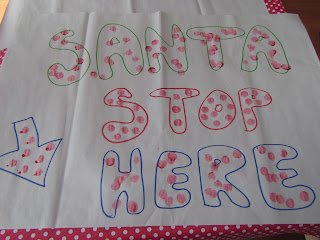
Santa stop here

The kids and I made some posters as part of our general Christmas decorating mission this month.


I helped outline some words, as requested, on large sheets of butcher's paper. The kids then used their dot marker pens to decorate their posters. We love our dot marker pens. They are mess free and easy to use. If you haven't used these paint pens before, you should check out their website: http://www.dotart.com/


Jasmine tried to copy the words I wrote but she was sitting opposite me so this proved a bit tricky.


We added our posters to our playroom wall, where we had already made some scrapbook paper snowflakes and decorated our shiny green paper Christmas tree.


None of us take after Toulouse Lautrec but at least our efforts are all adding to the Christmas cheer in our house!

Thursday, 6 December 2012

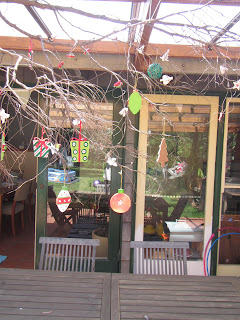
Decorative Christmas Branch

I don't know why but every year as Christmas approaches I feel compelled to go out looking for branches to bring home and decorate. So, despite the crazy heat this week, I wandered down to a nature strip near our house and found a branch that had fallen on the ground. Now that we have a lovely new pergola, this provided the perfect place to string up the branch and start decorating.


The kids helped me choose some Christmas decorations.


I like the way the branch hangs over our outdoor table and adds some extra colour and Christmas cheer.


The birds have also been interested in this new addition to the pergola. 

Monday, 3 December 2012

Christmas t-shirt decorating

I can't believe it is December already. I feel so behind with our Christmas crafts. I had imagined decorating the house from ceiling to floor and outside too this year but somehow we seem to be running out of time. I think we've been indulging in a few too many weekends away!

Anyway, we managed to squeeze in a bit of Christmas t-shirt decorating the other day which was fun. We used our favourite freezer paper stencilling technique - as seen previously on my blog when we turned an old sheet into a cubby house with fabric paint.

Jasmine made a candy cane and Alex a ginger bread man. I drew the outline of the shapes, as requested by the kids, on freezer paper and cut them out with an artline cutter.


I ironed the freezer paper onto the t-shirts. Alex and Jasmine chose their colours and started painting.


I love the colours and patterns they decided on. Once dry, we peeled the paper off.


And tried on the shirts ...


Lastly, I ironed over the painted t-shirts with a piece of cloth on top to seal in the colour.