Saturday, 27 July 2013

Time machine

By the end of the school week, we are usually looking for an activity we can easily and quietly do before dinner rather than energetically running around the back yard. Last week, we turned a box into a time machine. In addition to a box, we used the following materials:

  • Foil
  • Quicksticks silver tape
  • paper
  • textas
  • cardboard rolls
  • glue
  • buttons
First up, we covered the box in silver foil. We then added some drawings and buttons so we would have a control panel to allow travel forwards, backwards, fast, slow, landing and takeoff. We used cardboard paper rolls to make guns in case we came under attack by enemies.


My son suggested we go back in time to when the dinosaurs lived.

We also travelled into the future to see what the kids would be doing as adults ...


Our time machine had a flag labelled Alex and Jas' time machine of course!


The teddies also had a chance to check out the future. They told of some fantastic adventures where people don't talk to each other, instead they read each others' minds. People don't eat either, they just swallow tablets of food. The teddies were glad to return home safe and sound.


Sunday, 21 July 2013

Imitation gold and silver leaf

We made a few painted wooden items this weekend and experimented with using imitation gold and silver leaf on them. It is a bit messy to use but creates an interesting finish.


First up, Jasmine decorated a mirror.


Step 1: Give wooden surface a coat or two of paint (paint needs to be suitable for wood).


Step 2: Once paint is dry, apply a layer of mod podge with a paint brush.

Step 3: Sprinkle gold and silver leaf over the painted wood.


Step 4: Paint over the leaf with another coat of mod podge.

Step 5: Leave the mod podge to dry. It is likely you'll need to give the mirror a good clean.


Alex made a little money box.


He also made a robot. This was something Alex started a while ago as part of our hammer, nail and wood projects which we talked about here. Up until now the robot was very plain.


He looks much funkier with some paint. Alex decided against using any gold and silver leaf on his robot for now.


Friday, 12 July 2013

Pine cone crafts

We were recently given a bag of pine cones which the kids were very excited about. First we made some pine cone people using double sided sticky tape, buttons, feathers, googly eyes and felt.


Next we made a bird feeder. This involved spreading peanut butter over the pine cone, rubbing it with bird seed and stringing it up in our tree. Now we wait to see if the birds will like it ...

Sunday, 23 June 2013

Winter chalk drawings

On this very wintery wet weekend we decided to do some chalk drawings. This was another simple activity to keep us occupied while staying warm and dry. And the only materials you need are: black, grey and blue paper and some white chalk.


Our pictures included wet trees, soggy dogs and big grey clouds.


And our favourite muddy puddle of course!


I think black, grey and white pastels would also be good for this activity.

Monday, 17 June 2013

Making art - geometric shapes and patterns

Jasmine and I did some drawing on the weekend, using geometric shapes to make patterns. It is a great activity as all you need are some sheets of paper (we used A3) and coloured pencils. We started by outlining shapes on the page. Some shapes overlapped others. It was interesting to note the new shapes that formed in the spaces around the shapes we were drawing.


We then coloured in all our shapes in different colours until the whole page was filled with colour.


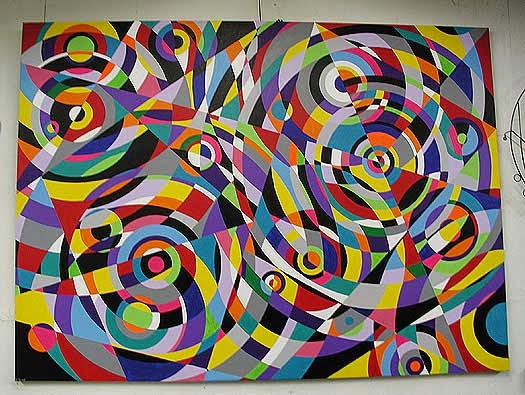
There's something intriguing about the different patterns and colours you can create using simple geometric shapes. I really like the work of Bruce Gray below.


And Kandinsky of course ... most inspiring!


Wednesday, 12 June 2013

Card houses

We've been busy busy in my household lately so haven't many creative activities to share. What I can say is we are obsessed with mastering the art of making card houses ....