Thursday, 25 October 2012

Air drying clay tea set


We recently used air drying clay to make a tea set. Alex loves any opportunity to play with clay and Jasmine has been asking me for a tea set for a while. So this was the perfect activity. For me too ... as it brought back all the fun memories of pottery classes when I was at school. We used the pinch pot method to make the tea cups and a tea pot. You can see a clear explanation of the pinch pot method over at The Chocolate Muffin Tree blog. They made some cool pumpkin pinch pots.

We've tried a few different brands of air drying clay this year - some white and some brown and the cheaper versions seem to be just as decent quality as the more expensive ones. Obviously, a little care needs to be taken when handling the finished products to avoid breakage.

Our clay dried very quickly with the warm weather, it was ready to paint in two days. Alex chose the paint colours for us. We used acrylics. I have some gloss enamel so thought about finishing off the pieces with a coat but for now we are happy with the matt finish of the acrylic paint. We don't plan on putting liquid in the cups so don't need them to be waterproof.


The kids' and their teddy bears have been enjoying a number of outdoor tea parties and picnics.

Monday, 22 October 2012

Haunted house with bats

With Halloween approaching, we decided to make a haunted house with an old carboard box, some paint and cellophane. My kids have loved scaring each other with ghostly noises and waving a torch through the windows of their cardboard house. There were only a few steps involved in making our haunted house:

Step 1: Apply a coat of paint to a cardboard box.


Step 2: Cut out window holes.


Step 3: Put cellophane over the window holes, using sticky tape.


You can drape cobwebs across your haunted house to make it extra spooky. I believe you can buy fake cobwebs at most discount stores.

We also cut out some cardboard bats and used sticky tape to attach them to wooden skewers. These have allowed the kids to create extra spooky shadows on the wall as they play with their haunted house. My daughter also requested some butterflies though she admitted you wouldn't find many butterflies in haunted houses.


I used a print out from the internet to trace for the bat and butterfly sillouhettes.

Thursday, 18 October 2012

Paper bag pinata

The kids and I were recently invited to a six year old's birthday party. The birthday boy had just returned from visiting family overseas and surprisingly wasn't jet lagged so decided to have a last-minute celebration. Rather than bringing food or a present I was asked to bring a game or activity. So the kids and I put our brains into action and decided to make a pinata.

We went to our craft cupboard and located a paper bag, our Quicksticks silver sticky tape and some other supplies. We use Quicksticks tape for all sorts of craft activities in our household - making rockets, robots, decorating, etc. It is easy for the kids to peel and apply. It is sturdy and has a great shimmery silver finish. You can see in an earlier post how we used the tape when we first discovered it.

Other supplies we used to make our pinata include:
  • streamers
  • paint
  • glue
  • wrapping paper
  • string or rope
  • lollies and goodies to put inside the pinata.


First we painted one side of the paper bag and then cut out some images from wrapping paper and stuck them on with glue. We used quick drying acrylic paint which meant we could get on with the decorating without having to wait for ages.


Next we cut some strips of different coloured streamers and covered the other side of the paper bag.


I used Quicksticks tape to fasten the streamers to the bag and added another image on top with glue.


Lastly I taped some more streamers to the bottom of the bag. I figured when it comes to kids' parties there is no such thing as too many streamers.


When we got to the party I attached the bag to a tree branch with thin string but this only lasted one hit so we then tied it up again with rope. I would also recommend adding extra tape to the paper bag handles to make sure they are super strong and won't tear.

The kids had a good time all taking turns hitting the bag with a stick and then descending swiftly like a flock of seagulls on the loot that lay scattered on the grass.

Monday, 15 October 2012

Pop Art activity

I love the bright, cheeky feel of Pop Art. I recently ordered a Pop Art canvas of Alex and Jasmine from Pascoe Pop Art. I'm super happy with the picture they created for us. Check it out below.


Having our new canvas on the wall has inspired us to create some pop art images of our own. I showed Alex and Jasmine some of my favourite famous Pop Art images such as Marilyn Monroe and the rows of Campbell soup cans.


Next we printed off some photos on our black and white printer so we could add our own assortment of colour to them with textas and create our own Pop Art.


Jasmine thought it was fun giving everyone bright coloured hair and crazy lips.


It was a fun activity though the final images aren't nearly as impressive as our new canvas and the famous images of Andy Warhol or Roy Lichtenstein.

Thursday, 11 October 2012

Our new relaxation space


The kids and I have been busy creating a new "relaxation space" in our house. The kids were given a mosquito net a while ago which I finally hung up. We put pillows underneath the mosquito net that we had decorated using the freezer paper stencilling method earlier this year - see our cubby house creation post.

On request from the kids, I also made two large super bright, fluffy cushions. I bought two European pillows and some fluffy fabric that was on sale at Spotlight. The pillows were quick and easy to make with my sewing machine.


Over the last week or so we have cut out different animal and flower shapes out of carboard and decorated them with paper cut-outs, sequins, gems and dot paint. The kids have also brought home their favourite pictures from pre-school and stuck them on the wall.


We think our relaxation space is most inviting and definitely a feel good space.

Wednesday, 3 October 2012

Homemade pirate board game

The kids and I have been playing all sorts of games lately - UNO, Dinosaur and Fairy Snap, the Bee Game, Snakes and Ladders, Hungry Hippos etc. However, we decided it would be extra fun if we created our own game for a change. We used the following materials:
  • cardboard
  • black marker pen
  • wooden pirate images
  • glue
  • dice
  • marker pieces.
 
First we drew the basic path and numbered the squares with a black marker pen, including "Start" and  "Finish" spots.
 
 
Alex helped choose the best pirate images that I had stashed in my cupboard and glued them onto the cardboard. The main aim of our game is to roll the dice and make your way along the path to find the treasure. The first person there wins. However, you may get unlucky on the way and have to miss a turn due to a surprise attack by enemies, or you may have to prove your skills as a pirate and give your best impression of a tough pirate.


We found some extra coloured marker pieces and a dice from an old game tucked under the kids' bed.

 
We were proud of our creation and enjoyed the chance to play something new - all for a very cheap price.

Friday, 28 September 2012

Fun doll faces

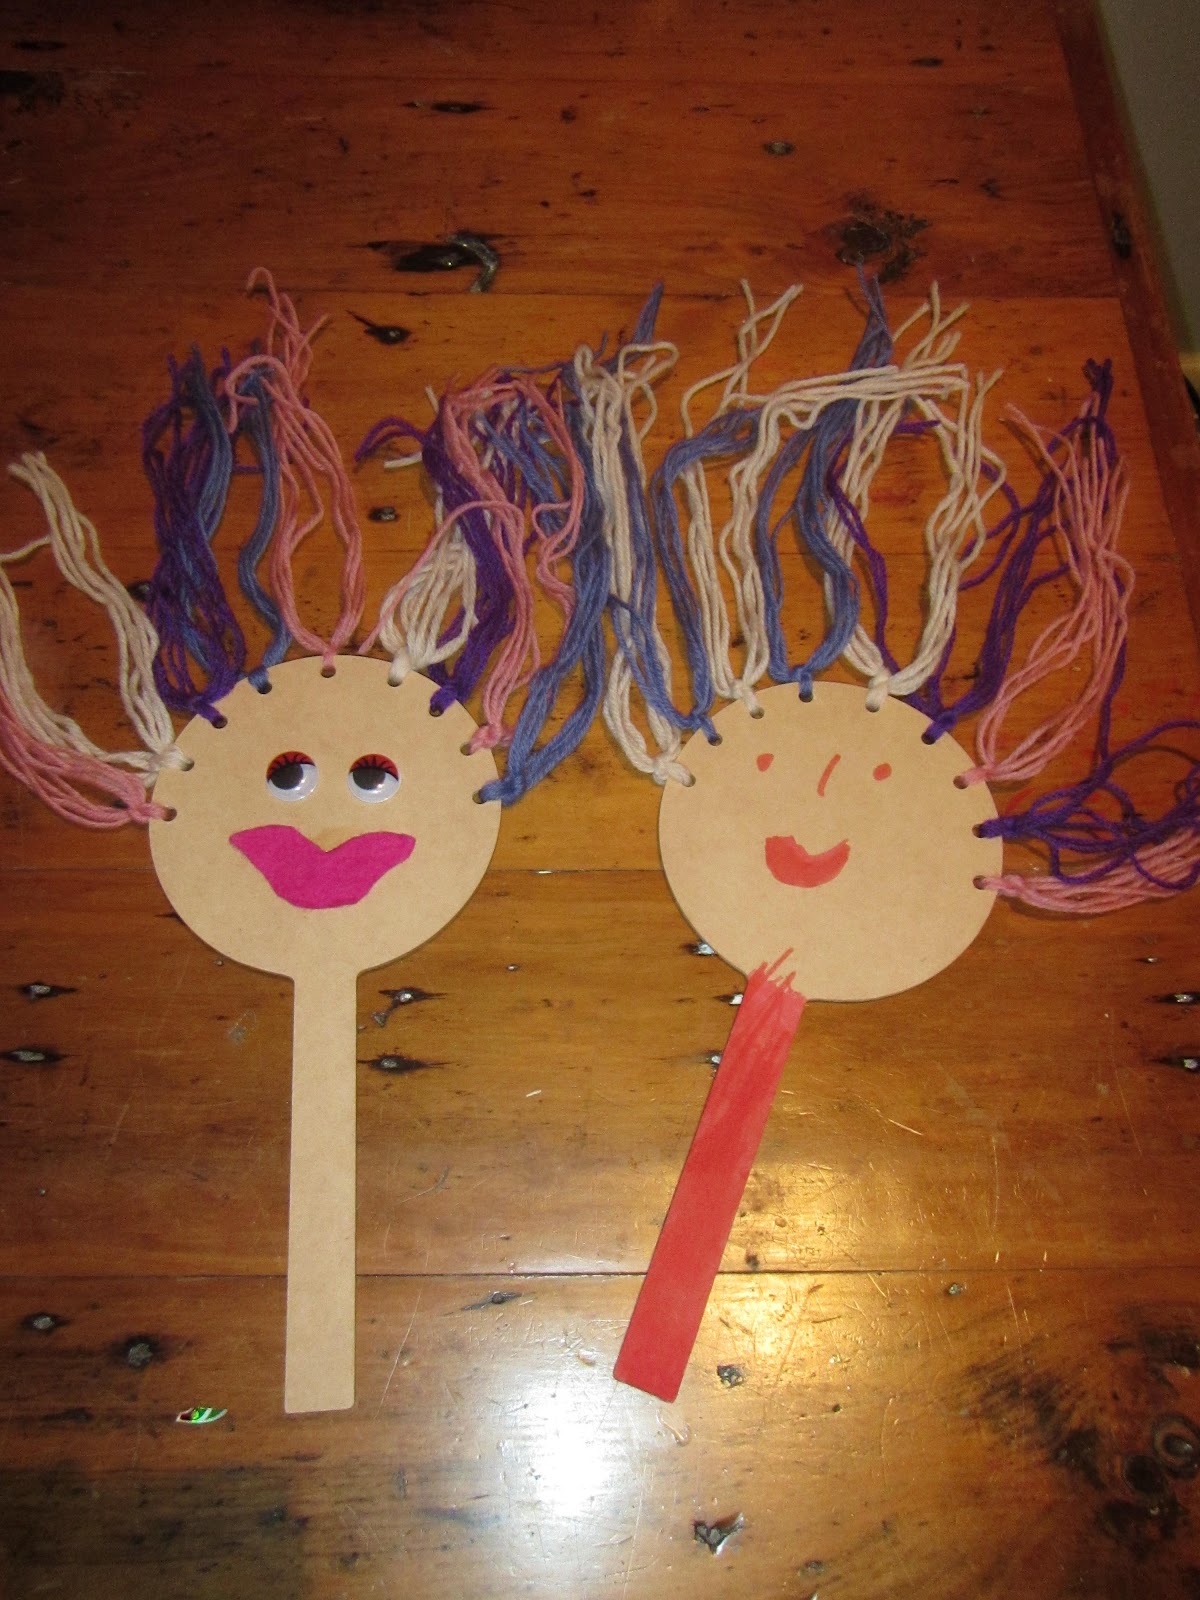
Jasmine and I made some fun doll faces using wood and wool as the main materials.


We found the wooden bases at one of our favourite craft stores in Sydney - IKKE in Crows Nest. I helped Jasmine thread the wool through the holes to make the doll's hair. Jasmine chose the wool colours and trimmed the strands for me.


Jasmine used texta to draw on a face.


I used googly eyes and felt for mine.


You can see in the photo below that Jasmine is pretty excited about her new doll faces.